Viewing Scan Data in Google Earth

Jul 10, 2025
 182
182
General outline:
- In Power BI, export the data that you'd like to import into Google Earth.
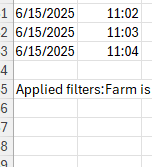
- Open the file with Excel, remove the last line that contains the applied filters, save that file as a CSV
- Open Google Earth
- Click on File, Import, and select your CSV.
- Walk through the Import Wizard
- Apply a Google Earth template
- View your data in Google Earth.
The following steps are needed to import to import scan data into Google Earth. The process looks tedious, but it only takes a couple of minutes to complete.
- Export the data that you'd like to map from Power Bi
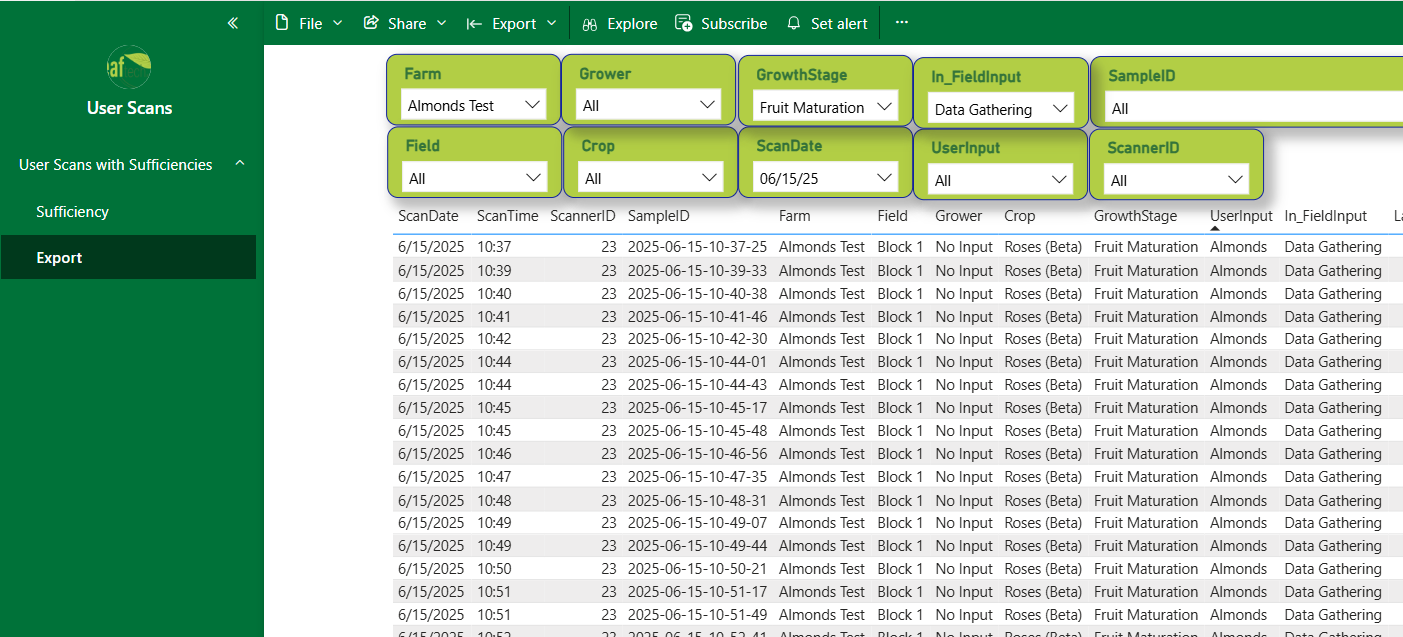
- Go to export, use the filters to get the desired data on your screen, then select the three dot menu in the top right and select export.
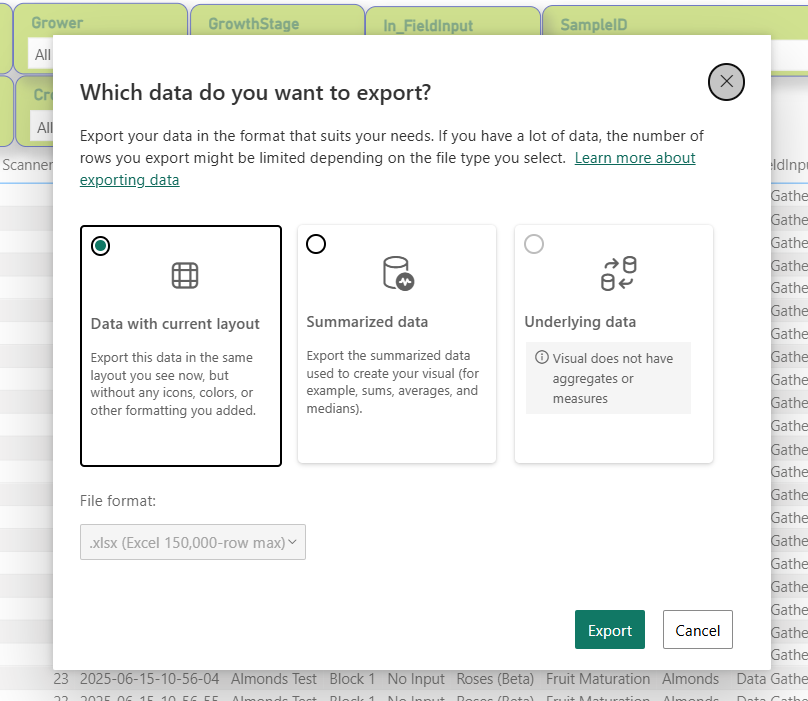
- Select "Data with with current layout, and click on Export.
- Save the file to your computer.
- Open it with Excel, remove the last line that shows the Applied Filters.
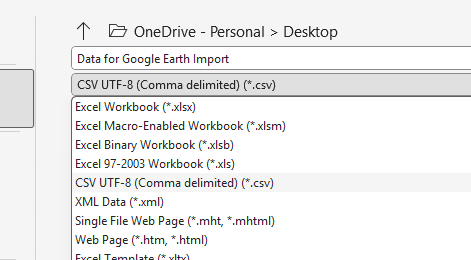
- Save the file as a CSV.
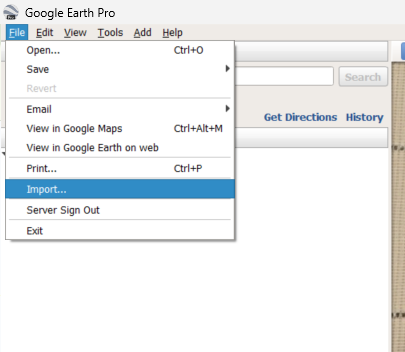
- Open Google Earth
- Click on File and select import
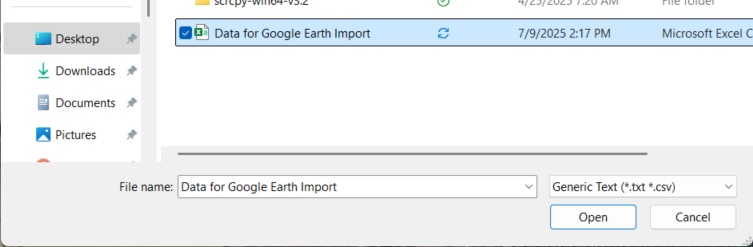
- Select the CSV that you saved earlier and select Open.
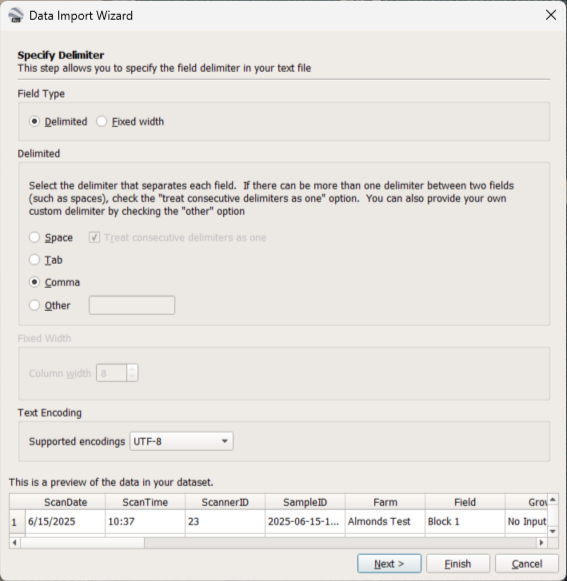
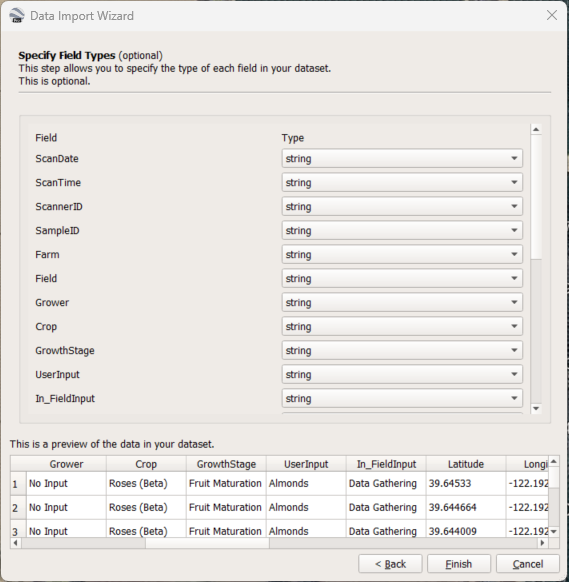
- Verify that the Data Import Wizard has the default items selected. Update if necessary and select Next.
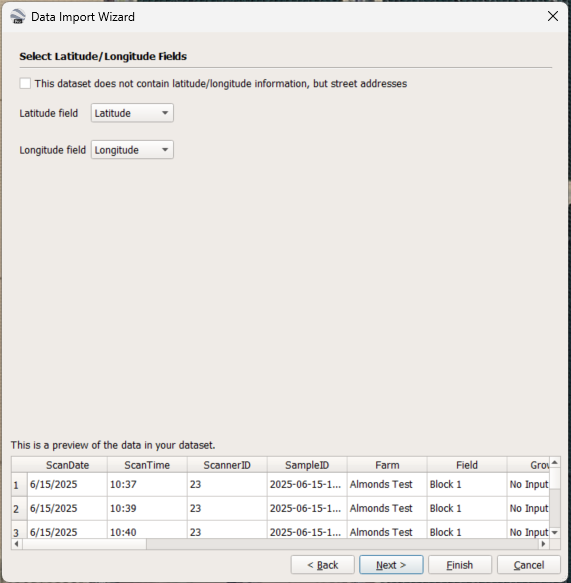
- Verify that Latitude and Longitude are selected for their corresponding fields and click on Next.
- Update Scanner ID to String and select Finish.
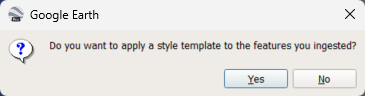
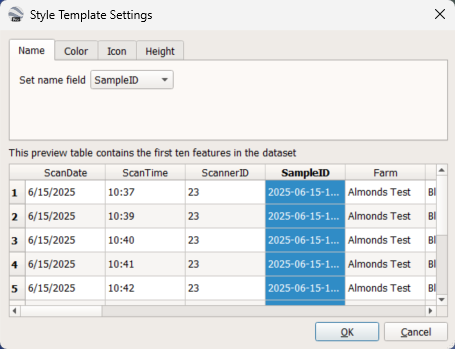
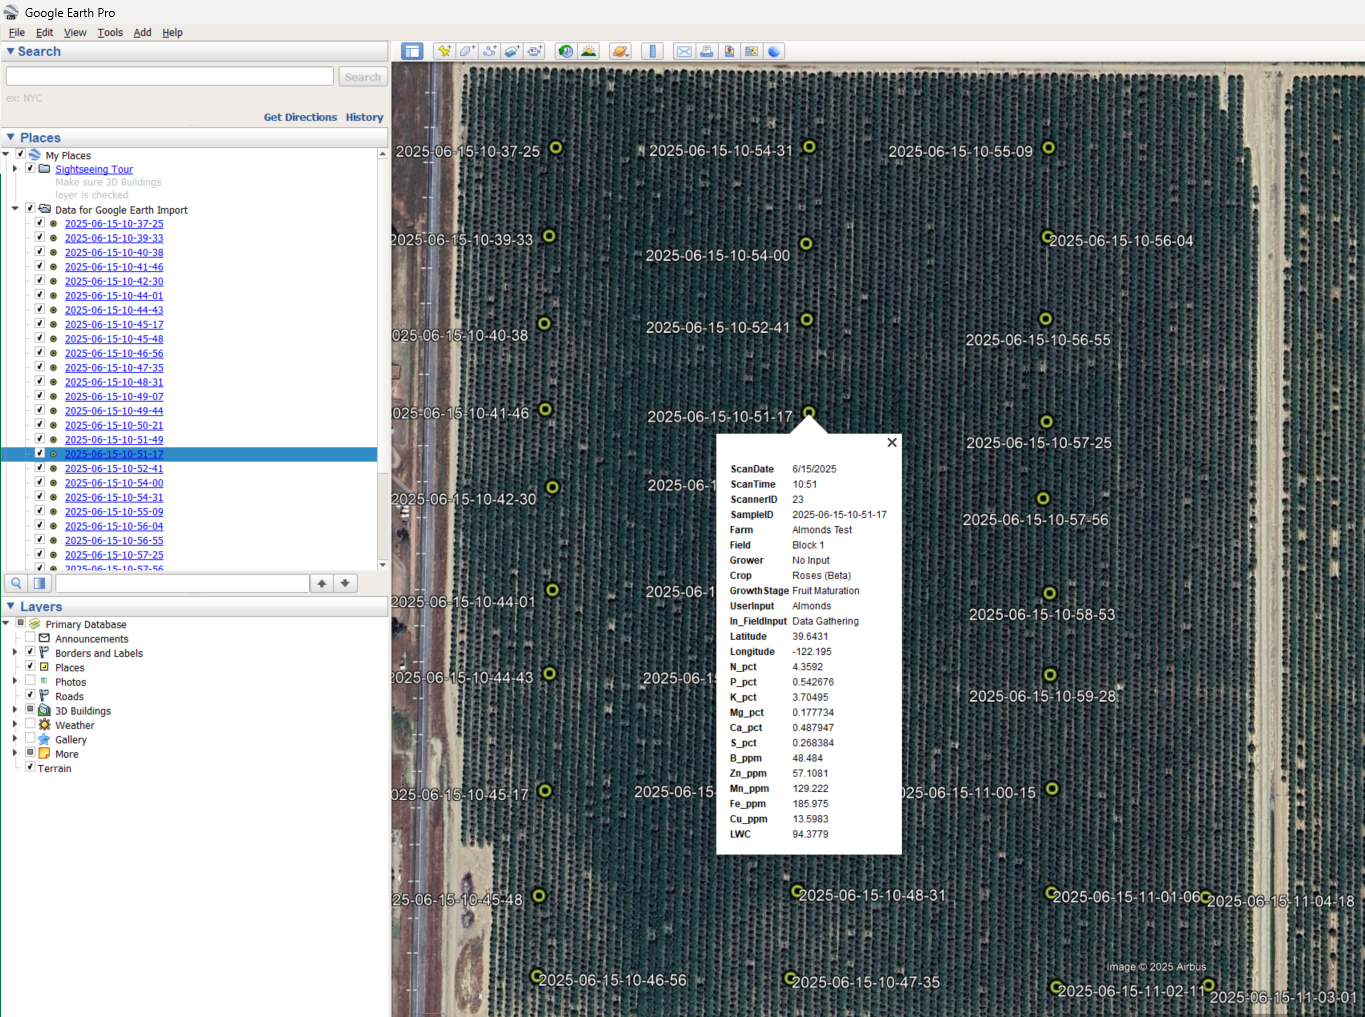
- Google Earth will ask if you'd like to apply a template to the data. I use one to name the pin drops with the SampleID and apply a green icon.
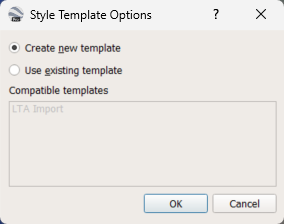
- Select "Create new template" and click OK.
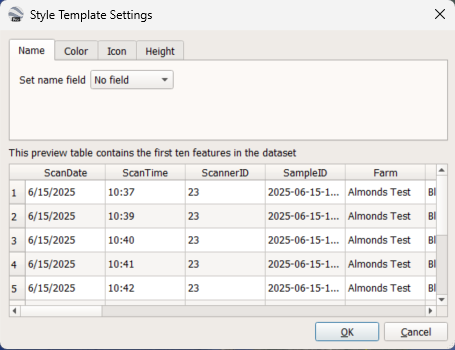
- Use the drop down to set SampleID as the name field.
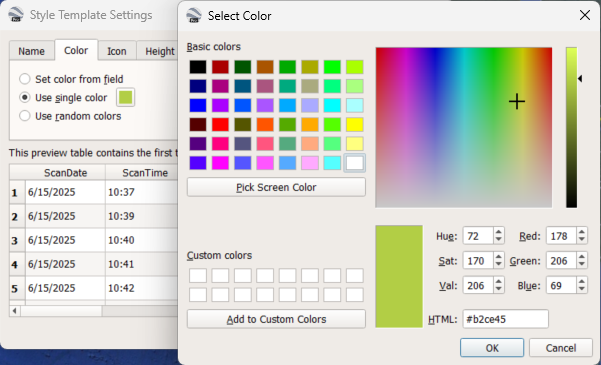
- Click on the Color tab. I prefer to use a single color.
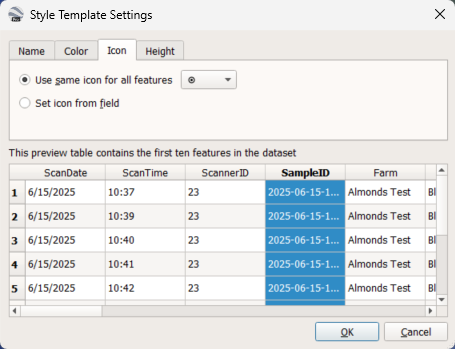
- Select the Icon tab and select your preferred icon from the drop down list and click OK.
- Name the template and select Save.
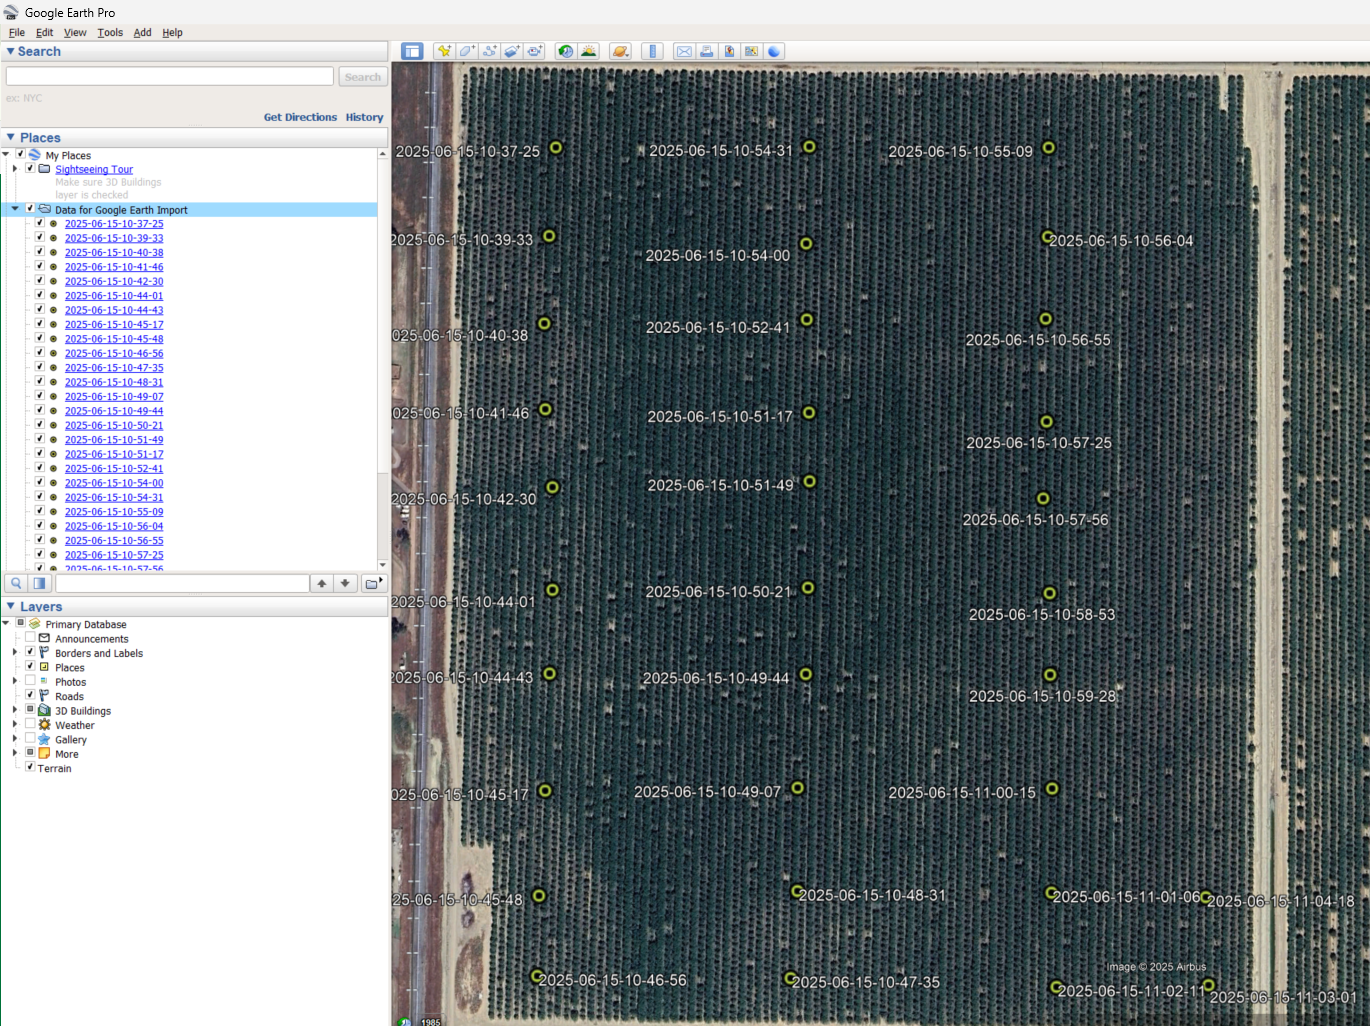
- Your data should now show. Note: it may show under temporary places.
- Clicking on a pin drop will give the scan results.
- Go to export, use the filters to get the desired data on your screen, then select the three dot menu in the top right and select export.