

Scanning

Sep 22, 2026
1

After getting started in the app, you may scan while on the Inputs or Map tabs:
- Place a single layer of leaf material on the scan bed.
- Ensure that 30-100% of the scan bed is covered (for additional info see article Scanning Tips).
- Press the scan button.
- The status LED will illuminate.
- A confirmation screen will be shown.
- Click OK if the contents on the confirmation screen looks correct. Click Cancel if it does not.
- Remove the sample from the scan bed.
- Repeat until field samples have been completed.
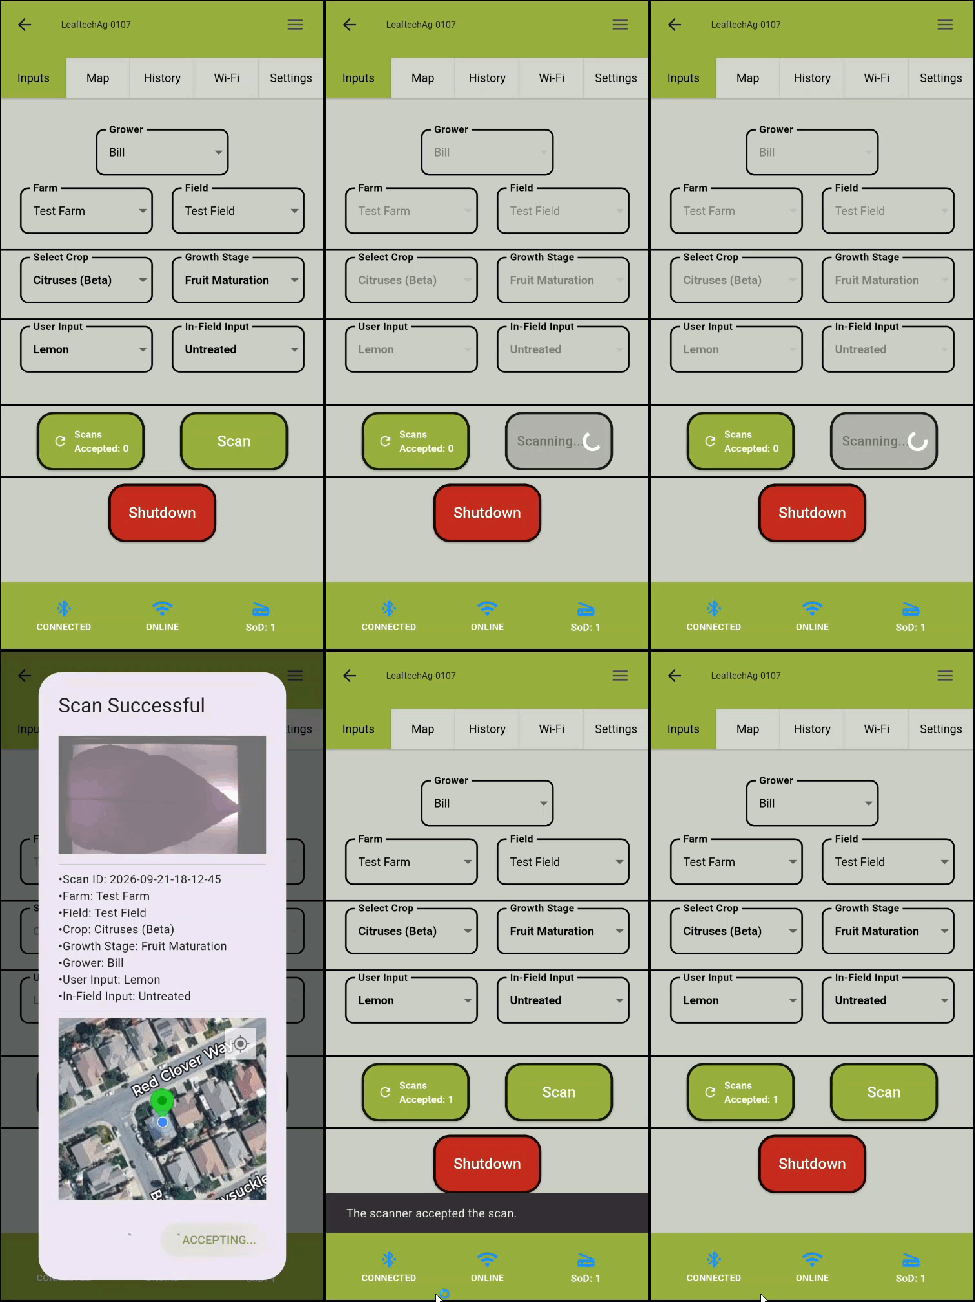
Note: While taking scans, you may notice that the Scans Accepted counter increases each time you take a scan and a pin drop will be added to the map view. Additionally, scans will be reflected on the History tab.
Next Article: After Scanning

