

Lab Tissue Sampling

Sep 22, 2026
0

After Getting Started in the App.
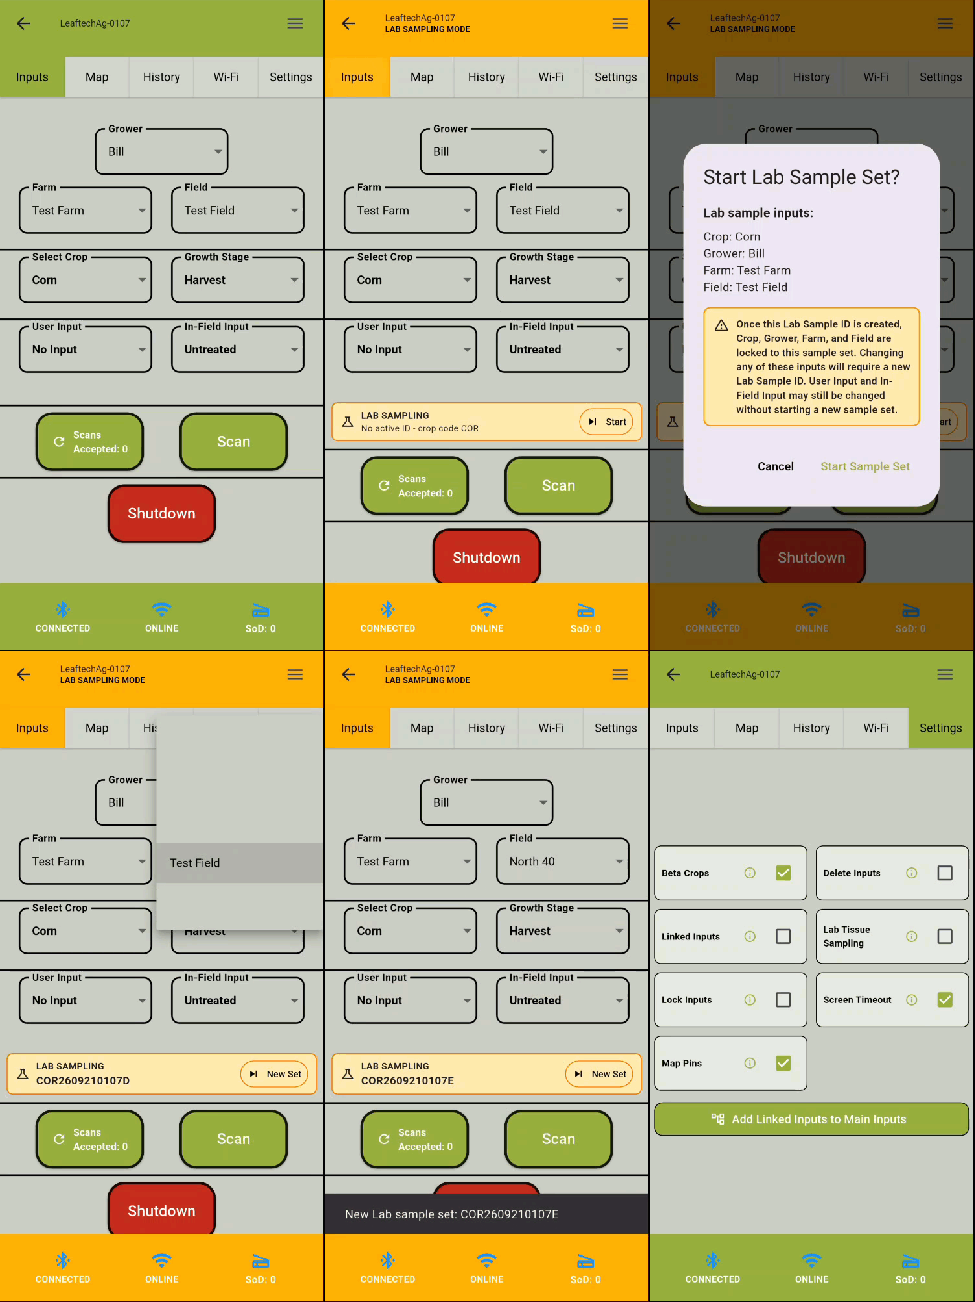
- Select the Settings Tab.
- Enable Lab Tissue Sampling.
- Note: The app colors will change to indicate that you are in Lab Sampling mode.
- Select the Inputs Tab.
- Select the inputs from the drop down lists.
- You may need to add the details if they were not previously entered.
- Select the Start button in the LAB SAMPLING section.
- Review the confirmation screen. If the details are correct, press the Start Sample Set button.
- A Lab Sampling ID will be automatically generated.
- Please note the ID on your sample bag and submission paperwork.
- A new Sample ID will need to be generated if any of the inputs need to be updated.
- Exit sampling mode by deselecting the Lab Tissue Sampling checkbox in the settings tab.
Next Article: Viewing Scans That are Waiting to Upload

